My quilting thoughts and inspirations sprinkled with a glimpse of life down on the farm

Monday, April 30, 2012

A finish!

Sharing Time -
[Apologies in advance, it's a gloomy day today and the photos aren't very 'sharp'].
Sewing Angels, by The Birdhouse

Raewyn's been making hexie-flowers again.

And doing a bit of applique.. and stitching.
Isn't she just lovely?
Whoop whoop first ever feathers on a quilt!
I really enjoyed making this quilt and am happy with the result. It's going to be a shop sample at my local, aka The Country Yard.
And just out of interest;
In her comment to this post, Suz questioned how necessary black tulle and a silver sharpie were for the method of stencil transfer (onto dark fabrics) practised in April's FMQ challenge. Here is a photo showing white tulle and black pen and black tulle and silver pen - interesting - in this case, both would have worked equally well.

And look what came in the post - the lovely Melody sent YD a surprise parcel last week, for being a 'new generation bear maker'.

Lovely mohair, bear shoes and one of her fabulous scissor fobs.
Cant think where the cute little chocolates have gone..?
YD was very excited and overwhelmed by the generosity of one of my 'bloggy friends'. Thank you Melody.

Here's to a fun and quilty week - happy stitching every-one,

Saturday, April 28, 2012

Weekend Diversion - Someone to Love....

I thought it would be nice to join in with Leanne's Someone to Love, Something to Do, Something to look forward to post on her blog.
Here is her inspiration -
"Happiness is pretty simple:
someone to love,
something to do,
something to look forward to.” ― Rita Mae Brown,
 
 She has a Mr Linky up so you can join in if you like,, or go and see what other bloggers are up to.

Someone to love....

This has to be the MOML - (Man Of My Life) - hardworkworking, funny, patient, tolerant and ever forgiving of me and my addiction :-)
One to hold on to, this one.
(Yes he has pulled his cap down over his face for the photo!)

Something to do....
The Crossword!! Our daily paper has changed its format, publication time, etc, this week. When we didn't get the Friday night Jumbo Crossword last night I was worried... whew... it's appeared in Saturday's edition :-) It's the one I look forward to every week.
 (Maybe I should have zoomed in on it more in case I need help with the clues...!)

Something to look forward to.....
-Spring - yes these little daffs are a sure sign that spring is on it's way.... trouble is we're only halfway through Autumn!!!

Have a nice weekend every-one!

Friday, April 27, 2012

Tulle and Feathers - April FMQ

It sounds a bit like a recipe for a wedding dress doesn't it?
Here's my report on the April FMQ Challenge, being run by SewCalGal.
This month's tutorial by Don Linn (see it on SewCalGal's blog) demonstrated a method of transferring quilting designs using tulle.
I've been able to use the technique to help me with a quilt I am currently working on.
Firstly I drew up a design to fit the space I will eventually quilt. I used a Flexi-curve to get a nicely flowing spine shape, then free-hand drew the plumes.
I taped tulle over the design and used a sharpie to draw it onto the tulle. Don tells us to use a hoop to keep the tulle nice and taut but I don't have one on hand that is big enough so I used my trusty masking tape to tape the design and tulle to my desk.

Drawn design, tulle and Sharpie
Then I pinned my tulle to the fabric and used a Clover blue marker to go over the design, transferring it to the fabric.

Removing tulle from fabric. The design came through pretty well. I went over
it in the odd spot. Pleased with how the little plumes at the top end came out.
Next step - sew it!! The photo below shows my Raewyn-version-cheap-as slippery slider. I've taped my applique mats to my sewing table to help with moving my quilt around (yes, used my trusty masking tape again!) (If you don't tape it on you are likely to sew it to your work (does that sound like the voice of experience to you?!). It also shows the mini-tutorial on bump-bump feathers which I printed off Joanne's blog (Threadhead) and pinned it to the wall to remind me which way to go. I haven't tried many feathers yet so thought I would give this method a try.[Thanks Joanne, I find your mini-tutes and notes very handy :-)] [Isn't blogland great?]

You can also see the foot on my machine. I suddenly realised that all this time I have had this machine and thought I was using the BSR function that I wasn't!!! I had it plugged in but not turned on! SO now I'm using the foot without the bulky BSR mechanism on it!! (Sorry about the overload of exclamation marks but I am such a GOOF!)

Here is the end result -
I enjoyed this method - I see it as another technique to put in the tool box. Regular readers may remember that I used it recently to transfer stitchery designs.Next hurdle is to put these feathers on the quilt I am doing. As the block I am quilting is dark, I will need black Tulle (check) and a silver Sharpie, so I'll be looking for one of those in town later on today. Then it will be more feather fun - wish me luck!
I took this photo of our driveway yesterday, showing the Autumn colour here. In Northland there are a lot of evergreens planted (and native bush) so we don't tend to get the same beautiful autumn scenes as seen elsewhere. Also, because we don't quite get the cold snaps the trees often don't tend to suddenly change colour.  We are trying to plant a few more deciduous trees as they really are lovely when they do change.
Happy sewing everyone - thanks for popping in,


Tuesday, April 24, 2012

A Farmer's Wife dilemma

As a Farmer's Wife, a Farmer's Daughter, A Farmer's Grand-daughter (and more) I thought tackling the Farmers Wife Sampler Quilt was a GOOD idea!! This year I joined the Farmers Wife quiltalong run by Donna. Inspite of the wonderful support from her I haven't got as far along on my journey as I would have liked (!) but I have competed 8 blocks.Now to my dilemma - how does a Farmer's Wife display her blocks?-
On a Farmer's Wife's Farmbike?....
#20 Churn Dash
...In a Farmer's Wife's Woodshed?...
#10 Bowtie
....In a Farmer's Wife's garden?...
#103 Whirlwind
...on the Farmer's Wife's Gumboots?....
#2 Autumn Tints
...or on a Farmer's Wife's floor?
Less adventurous but easier to arrange!
#34 Flock, #21 Contrary Wife (had to make that one)
#9 Box and #16 Calico Puzzle
So far, all machine pieced.  These are 6" blocks, which I find quite a nice size.
As usual with me, my fabrics are a mixture - I'm not very good at sticking to themes, ranges or eras. I am using, mostly, reproductions fabrics - and anything else that takes my eye.

I've had a bit of fun making this pin cushion for my ED this week. I made YD one earlier on this year so now I have evened it up with one for each girl.
No red felt for the embellishment so I made a red yo-yo instead!
She's called Henrietta Turtle; a Heather Bailey pattern. I quite enjoyed making it but I must admit it nearly ended up on the compost heap at one stage... however I pulled out the stuffing and tried some different fill and had a lot better success - I couldn't believe what a difference the better quality stuffing made!
Here's Henrietta, now called Frank, with his new Mum, ED, on the right
(and YD on the left).
We popped down to Auckland to see her for her birthday today.
Time to go - thanks for visiting, and happy stitching,

Thursday, April 19, 2012

Lucky in blogland and and a new idea....

I have a lovely list of thank yous to share. It must appear that my cup runneth over but, honestly, I am not unhappy about that. In fact I am extremely greatful and excited to have been the lucky recipient of some giveaways in blogland this year.
Receiving lovelies in the post is just so exciting - most recently Carole from Madness and Mess sent me this ... it was wrapped up so beautifully I found it really hard to undo!!!
Isn't it sweet - this brooch will look great on my work apron lined up with other treasures I have collected.  Carole does such lovely work - thank you so much.
This year I joined up with Kathy from Sew-Happy House's Friends With Benefits Swap - the deadline for this is fast approaching but I am under control (I hope). The wonderful Kathy has been doing regular draws for those who are taking part and to my delight I received this gorgeous charm pack.
Joy, by Kate Spain, Moda.
This will make a fun Christmas project.
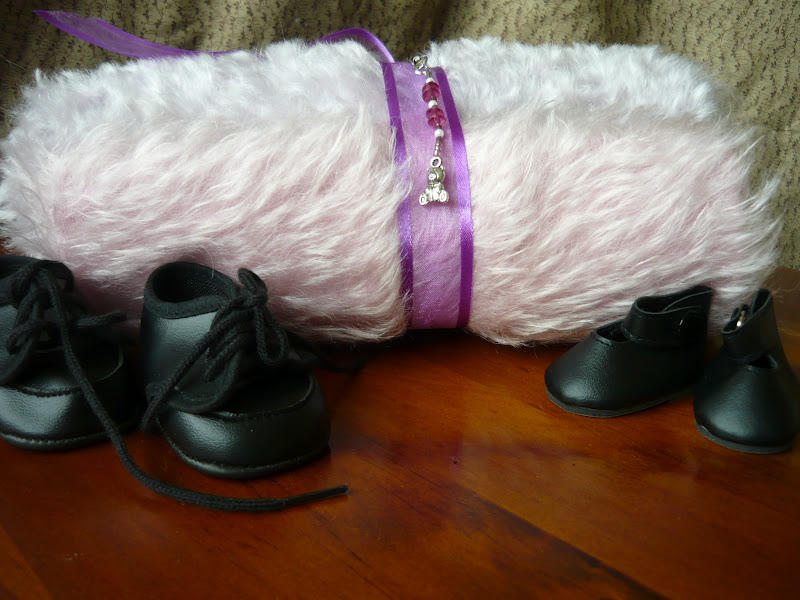
And earlier in the year I won a giveaway from Melody whose blog, The House on the Side of the Hill is full of creativity and inspiration. I won a voucher to spend at the Want It, Need It, Quilt It on-line store and I must admit it took me a while to decide which yummy to buy. Jane was so obliging, flatpacking my purchase to save on postage - hence the jelly roll is in bits. I chose Papillon by 3 Sisters. I also look forward to doing something with this. I did pop in a bit of my own $ in to help pay for this, and also bought a perspex hexagon template I can use for fussy cutting.
It's seen here with the lovely scissor fob Melody sent me for Christmas which I realise I haven't shown yet. ( Shame on me).
Lovely! Thank you Melody for your generosity.
Thank you all for these gifts, I really appreciate receiving them.

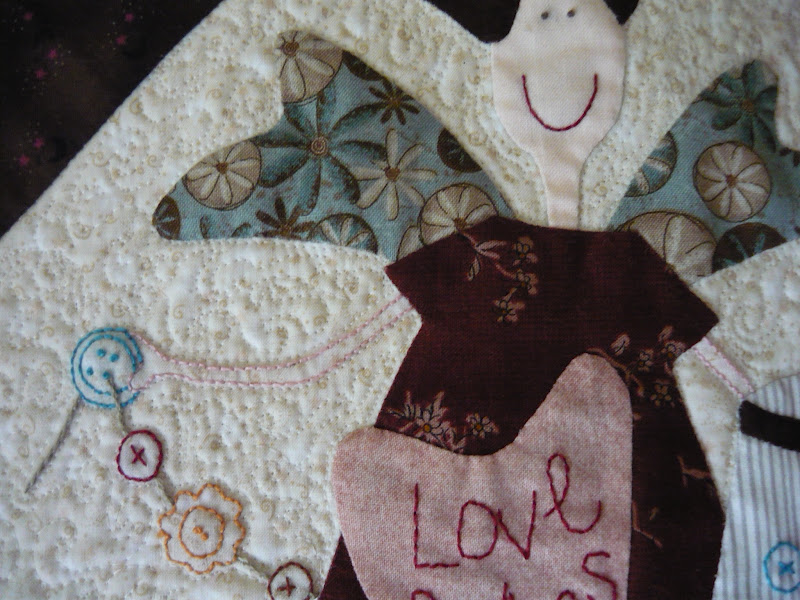
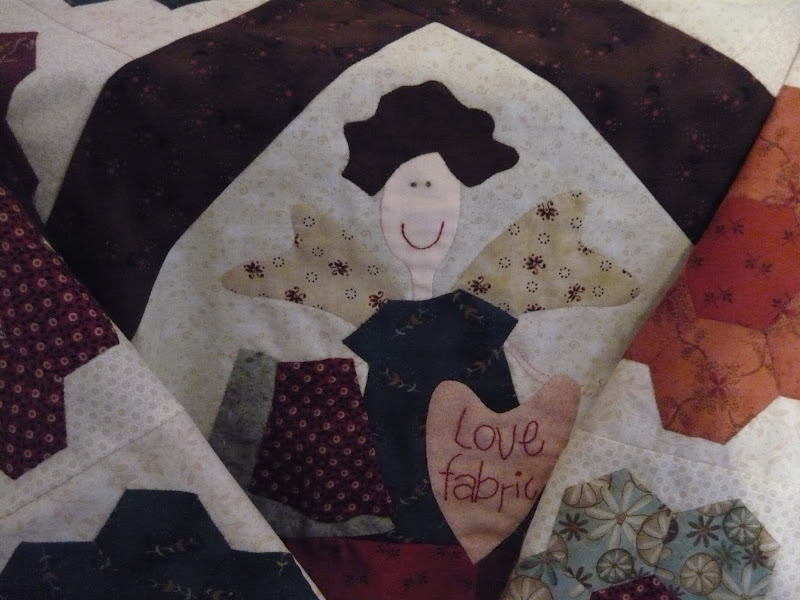
Lately I have been concentrating on putting together this gorgeous quilt. It will be a shop sample for my 'local' (aka as The Country Yard) and I will show more of it later. For now I want to show something I tried this afternoon.
When I do my hand turned under applique I often have the difficulty of how to transfer a stitchery design to the front of my work - there are too many layers to see through for tracing.
[On the heart in the photo above there are 2 darkish layers of fabric as well as the background fabric. Sometimes I draw the design on the back of the background when first transferring the applique design - but stitching using a guide from the back can be slow and difficult.]
EDIT - I applique using the back basting method so marking the stitching design first isn't practical.

I adapted the method of using tulle to make a stencil for transferring quilting designs as shown by Don Linn in this month's FMQ Challenge hosted by SewCalGal.

Here is what I have did today -
Traced the stitchery design onto tulle with a marker pen. Then pinned my tulle
to my fabric.
Drew over design on tulle with a pencil, remove tulle, and Volia!
One stitchery design easy to stitch.
I think this would be tricky with fiddly little details but it worked well in this situation. So I've learnt something today!!
Hope something has given you pleasure today :-)
Thanks for visiting and happy stitching!

Tuesday, April 10, 2012

Treasures from the past (and exploded apples)

I hope every-one had a lovely Easter weekend. I enjoyed the relaxed pace of the weekend, catching up with family, and the odd bite of chocolate didn't go amiss, either :-)
I was down at my parents' place again last week and while doing a spot of minor furniture reorganisation (the things we need to do to accomodate Irons in Bedrooms!) I came across these lovely treasures in a drawer...
The doilies below were made by my Great Grandmother (Dixon) many years ago. Mum said she made sets of these for various family members and these were made for my Nana's house. Mum remembers them always being around so were likely made in about the 1930s.
The technique used for these is Hairpin Crochet which creates lengths with loops at either side; these are then 'woven 'or looped together to create the finished article.
The photo to the left shows a 'modern day' hairpin--- this is one I used as a teenager when I had a play with this technique. Unfortunately I cant put my hands on the surround I made for a kitchen glass (to turn it into a pretty vase) that I made at the time.

Another treasure (below) in the drawer was this lovely Fillet Crochet yoke which Nana Dixon also made. Mum tells me beautiful yokes like these were made, and attached to the clothing (in this case a nightgown). When the nightgown was worn out, the yoke was unpicked and attached to a new one.

The photo below shows a few other little bits... Mum monogrammed the hankie for her Mum when she was a youngster (E for Eleanor but she was always known as Nellie, which suited her so much better, in my opinion). She also made the colourful table runner when she was at Primary School; they called it 'huckerback embroidery' but is apparently also known as Swedish Weaving. The beaded jug cover was made by (Great) Nana Dixon again; I've often thought I would like to make one of these but have never got around to it.

We were well into Autumn Harvest down at my parents'. Dad has planted a large variety of fruit trees and we enjoy discussing, comparing and tasting them all. These apples, seen here with a standard supermarket apple, are known for their size -

Monty's Surprise Apple.These 'average- sized' apples weighed over
600 grams EACH!
[Do you like my new wall colour in my kitchen? Tricky to find something
that looked good with the inherited bench colour - but I'm loving it!!]
I brought a couple back up home with me and have had a bit of fun making Baked Apples for tea. (An Alison and Simon Holst crockpot recipe).
The first day I put them on to cook way too early (I do have a tendency with the Crockpot to put it on in the morning and then ignore it all day).

 By 3pm the apple looked like this - exploded - and it was still 4 hours till tea-time - tasted good though!!
The second day I only let the apple cook for 3 hours - still yummy and looked so much better!
Perfect - a very filling dessert for two!!
I am linking up today to Melody's Tuesday Treasures. If you want to see more treasures simply follow this link and go to her blog.
Have a great day everyone,
and Happy Stitching,